Have you ever wanted to have a whole home audio system in your house that you could stream all of your favorite content to? I sure did. But when I looked on the market for already pre-built solutions, I was shocked to see exactly how much systems like this cost!
Everyone has heard of Sonos right? They are the leader in the industry for this type of setup. But who has $400 for their receiver? I didn’t. So I thought to myself, there has to be a better way. And there was…. Enter the Raspberry Pi. I don’t know about you but a $35 solution was a much more viable option then the aforementioned.
Okay, enough of the logistics. You came here to learn how to set up one of these for yourself. I will give you step by step instructions on how to do this. So here we go!
Parts List
- Raspberry Pi 2 or 3
- Micro SD card (4GB or more to support the size of the OS)
- A Network Connection (Wired or WiFi)
- Speakers
- A Device That Supports Airplay
Flashing The SD Card
First things first. We need to set up the raspberry pi as an airplay receiver. Our raspberry pi needs an operating system. Head over to www.raspberrypi.org/downloads and download the most current version of Raspbian. Once you have that downloaded, you are going to need two more pieces of software (SD Card Formatter, and Win32DiskImager).
Insert the sd card into your computer and open up SD Card Formatter. You should see a screen like this.
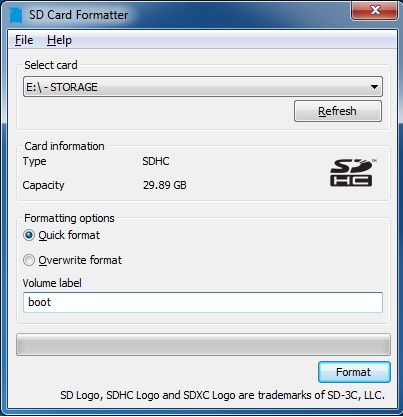
Choose quick format, and let that puppy roll. Once that is done, you can close that program and open Win32DiskImager. Select your SD card in the “device” drop down menu, and then click the folder icon. Browse to the Raspbian image file that you downloaded earlier and select it.
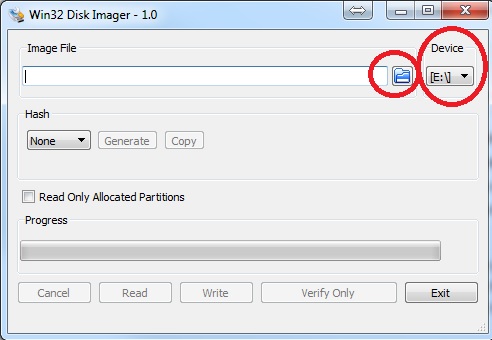
Once you have the image file selected, click on the write button. This will write the image file to your sd card in a bootable format. This may take some time to write, so be patient. This would be a good time to go get a beer, because once this is finished we are going to dive into the linux command line. It is not as scary as it sounds…trust me
*Helpful hint. The new versions of Raspbian do not have SSH enabled by default. Here is a quick workaround. Once your image has been written to the sd card, open up a file explorer and browse to it. In the root of the sd card, create a txt file called ssh with no file extension. This will enable ssh if you are using a headless setup (no monitor).
SSH Into The Raspberry Pi
Now that you have flashed the sd card with the operating system, we need to remove the sd card from the computer and insert it into the Raspberry pi. Connect your internet source and power the pi on. Wait a few minutes for it to fully boot up. Now we must find out what the ip address of the pi is so we can SSH into it. Download a network scanning tool such as this one (Angry Ip Scanner). After this is installed, run the scan. Under the manufacturer heading look for “Raspberry Pi Foundation”. This is your Raspberry Pi. Write down the IP address assigned to it and lets move on.
Next order of business is to download an SSH client. I recommend using Putty. Download, install, and open Putty.
Once putty is open, type in the IP address you got earlier from the Angry IP Scanner. Make sure that SSH is selected, and click open.

Once you are connected you will see a Putty security warning. Just click yes on this to proceed. This is due to the fact this is the first time Putty is connecting to this device.
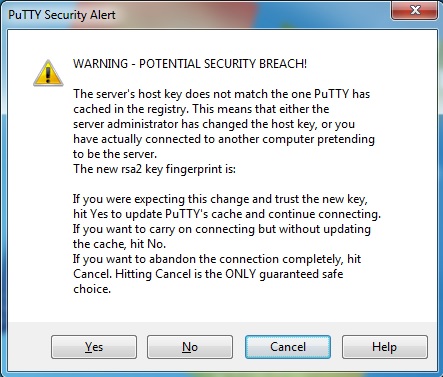
You are now greeted with the raspberry pi console window and need to log in.
username: pi
password: raspberry
Expanding File System / Updating Packages
After logging in you will be at a prompt that looks like this pi@raspberrypi:~ $. Now we must expand the file system so we have room to install all of the prerequisites. Type in sudo raspi-config and press enter. Scroll down to Advanced Options and hit Enter. Then select Expand File System and press Enter. After it resizes the file system, go ahead and select Finish. It will then prompt you to reboot your Pi.
After your Pi reboots, open Putty again and SSH back into the pi and log in. You will be back at the pi@raspberrypi:~ $. At this point we are going to update and upgrade the OS. This will take some time to do. Enter the following commands in order.
sudo apt-get update
sudo apt-get upgrade
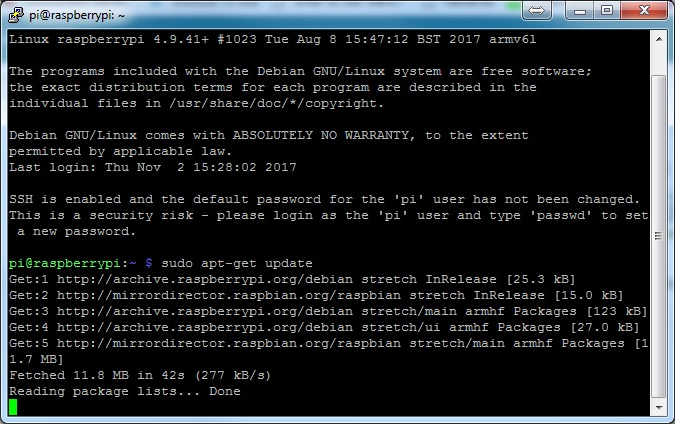
The Pi will then go through and install all of the updates and upgrades. Like i said this may take awhile (especially the upgrade command). Sounds like a good time for another beer!
Changing The Audio Port
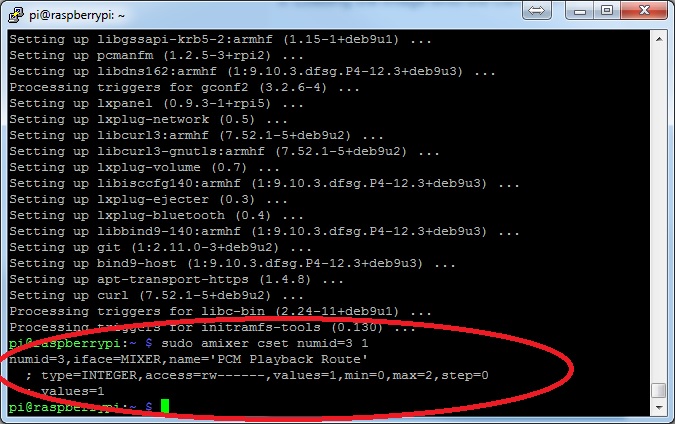
By default the audio port on the Raspberry Pi is set to use the HDMI port for audio. Unless you are going to be connecting this setup to a fancy receiver that has HDMI in ports on it (which I highly doubt you are), then we are going to want to change this so the audio can come out of the 3.5mm port on the Pi. This is done very simply. Just run the following command.
sudo amixer cset numid=3 1
Time To Install The Prerequisites
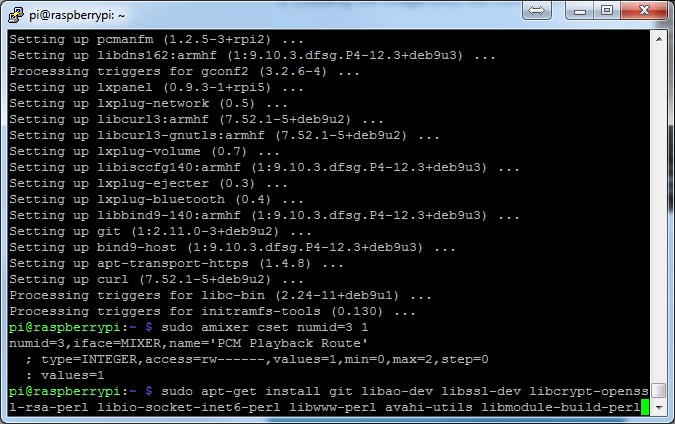
This project is going to require us to use a program called Shairport. We need to install a bunch of prerequisites before we can install the Shairport portion. Fortunately this can be done by one long command. I would recommend that you copy and paste the command from here so that you don’t miss a part or type it incorrectly.
sudo apt-get install git libao-dev libssl-dev libcrypt-openssl-rsa-perl libio-socket-inet6-perl libwww-perl avahi-utils libmodule-build-perl
This command installs the necessary libraries, openssl, perl and avahi utilities.
Install Perl Net-SDP
Airplay is an iOS proprietary protocol that uses SDP. We need to install this protocol to the Raspberry PI so that our devices that have Airplay enabled can communicate with the PI. This is done by entering the following commands in this order.
git clone https://github.com/njh/perl-net-sdp.git perl-net-sdp
cd perl-net-sdp
perl Build.PL
sudo ./Build
sudo ./Build test
sudo ./Build install
cd ..
Running these commands will install the SDP protocol and place them in the correct locations. We are almost done now. Keep pushing forward!
Installing Shairport And Running It
Now all we need to do is install Shairport and run it from the PI. Doing the will turn the Raspberry PI into an Airplay Receiver…aka a $35 Sonos! Run the following commands in order.
git clone https://github.com/hendrikw82/shairport.git
cd shairport
make
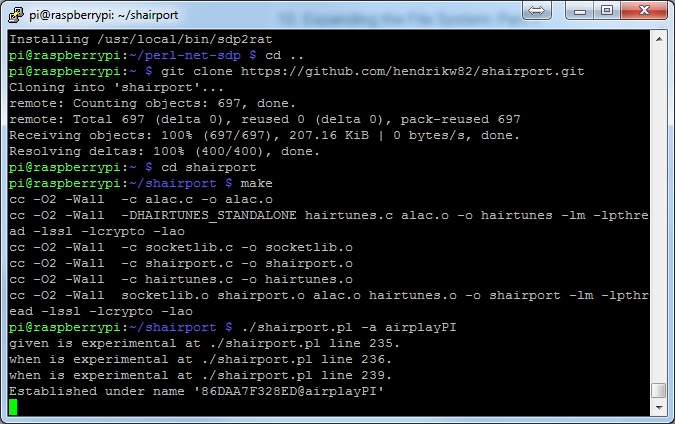
Now that we have Shairport installed and in the correct location, all we have left to do is run the script. Enter in the following command:
./shairport.pl -a (what you want to call the receiver)
* After typing -a, give your Raspberry PI a name. This is what will show up under your Airplay speakers on your phone or Airplay enabled device.
Lets Check If Everything Worked
Now its time to see if all of our hard work has paid off. Go on to your iOS device or itunes on your computer and click on the Airplay button. You should now see the name of the Airplay speaker that you set up in the previous step (the name after -a). In our case it is called “airplayPI”. And wouldn’t you know it….there it is!

Daemonize Shairport
The is the last and final step of the setup. We need to set shairport to start automatically when the Raspberry PI is rebooted. If we didn’t do this we would have to run that ./shairport.pl -a command every time…and who wants to do that? Here are the steps to set this portion up:
*Hold ctrl + C to stop shairport from running and then enter the following commands
cd shairport
sudo make install
sudo cp shairport.init.sample /etc/init.d/shairport
cd /etc/init.d
sudo chmod a+x shairport
sudo update-rc.d shairport defaults
sudo nano shairport
Now once in this file, look for the line that starts with DAEMON_ARGS=” -w $PIDFILE. Add the name of your shairport receiver here, so in our case it would look like this:
DAEMON_ARGS=” -w $PIDFILE -a airplayPI”
After this is done, make sure you save the file. Go ahead and reboot the PI, and your new Airplay receiver is ready to go! Just hook up your favorite speaker to the PI and enjoy streaming music to your $35 receiver you build and coded yourself!